Outlook to OneDrive This workflow automates the process of saving binary attachments from Outlook emails into newly created folders in OneDrive. It's ideal for users who regularly receive files and need them organized into separate folders without manual intervention. Each folder is automatically named based on the email subject and the current timestamp, allowing all attachments from that email to be stored inside the corresponding folder. This is particularly useful for streamlining document
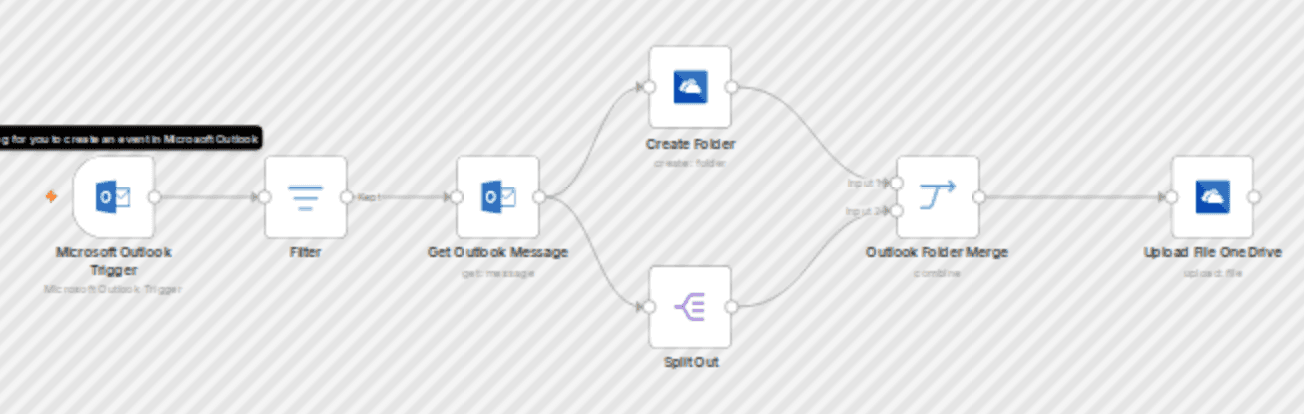
Outlook to OneDrive This workflow automates the process of saving binary attachments from Outlook emails into newly created folders in OneDrive. It's ideal for users who regularly receive files and need them organized into separate folders without manual intervention. Each folder is automatically named based on the email subject and the current timestamp, allowing all attachments from that email to be stored inside the corresponding folder. This is particularly useful for streamlining document workflows, improving file traceability, and reducing the time spent on repetitive tasks like organizing client submissions, invoices, or internal reports. The configuration and setup of the workflow can be customized to meet the business or personal needs of the user. Its purpose is to automatically process binary attachments from Outlook emails and upload them to dynamically created folders in OneDrive. Overview 1. Microsoft Outlook Trigger – Monitors your inbox for new emails. 2. Filter – Ensures only emails with binary attachments proceed. 3. Get Outlook Message – Retrieves the full email and downloads attachments. 4. Create Folder – Makes a new folder in OneDrive based on the email subject and time. 5. Split Out – Extracts each binary attachment. 6. Merge– Combines folder and file data before upload. 7. Upload File OneDrive – Uploads each binary file into the new folder. Need Help? Have Questions? For consulting and support, or if you have questions, please feel free to connect with me on LinkedIn or via email.
Download the workflow JSON file after purchase.
Open n8n → click the menu → Import from File.
Select the downloaded JSON and import.
Set up credentials for each node that requires them.
Click Execute Workflow to test, then activate.
Setup guide included
Purchase to unlock the full step-by-step guide
No reviews yet
Be the first to buy and share your experience.
Leave a review
Sign in to share your experience with this workflow.
Create a free account to purchase workflows.
Need help setting this up?
Book a 3-hour live setup session with an Agility consultant.