Generate invoices and send AI-powered reminders with Jotform and Xero
Xero
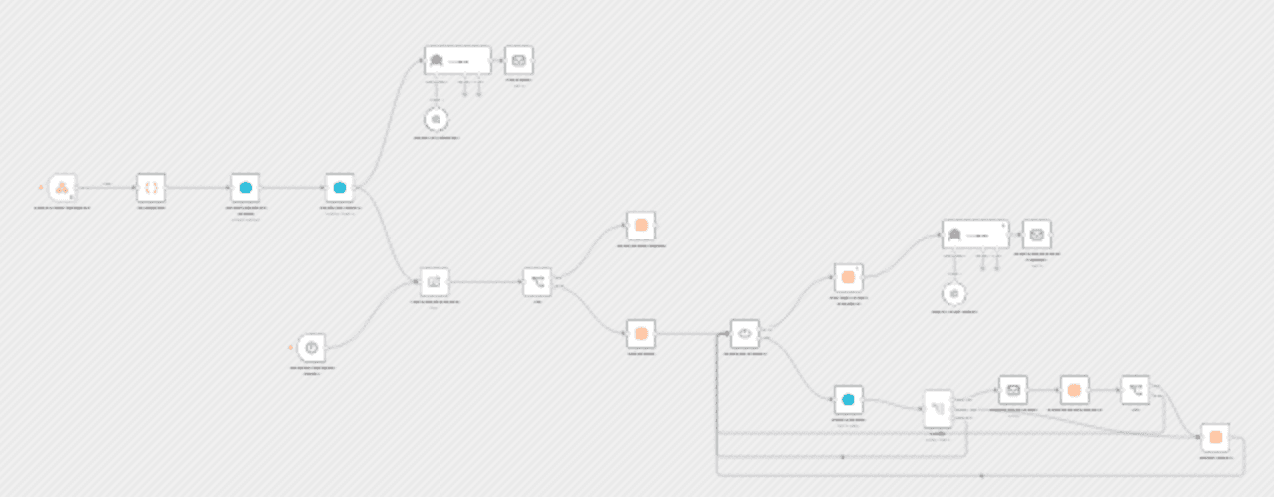
Generate Invoices and Send Reminders for Customers with Jotform and Xero This workflow automates the entire process of receiving a product/service order, checking or creating a customer in Xero, generating an invoice, emailing it — all triggered by a form submission (via Jotform), and sending invoice reminders. How It Works 1. Receive Submission - Triggered when a user submits a form. - Collects data like customer details, selected product/service, etc. 2. Create/Update The
About this workflow
Generate Invoices and Send Reminders for Customers with Jotform and Xero This workflow automates the entire process of receiving a product/service order, checking or creating a customer in Xero, generating an invoice, emailing it — all triggered by a form submission (via Jotform), and sending invoice reminders. How It Works 1. Receive Submission - Triggered when a user submits a form. - Collects data like customer details, selected product/service, etc. 2. Create/Update The Customer - Creates/Updates the customer. 3. Create The Invoice - Generates a new invoice for the customer using the item selected. 4. Send The Invoice - Automatically sends the invoice via email to the customer. 5. Store The Invoice In DB - Stores the needed invoice details in the DB. 6. Send Reminders - Every day at 8 AM, the automation checks each invoice to decide whether to: send a reminder email, skip and send it later, or delete the invoice from the DB (if it's paid or all reminders have been sent). Who Can Benefit from This Workflow? Freelancers Service Providers Consultants & Coaches Small Businesses E-commerce or Custom Product Sellers Requirements - Jotform webhook setup, more info here - Xero credentials, more info here - Make sure that products/services values in Jotform are exactly the same as your item Code in your Xero account - Email setup, update email nodes (Send email & Send reminder email & Send reminders sent summary) - Create data table with the following columns: invoiceId (string) remainingAmount (number) currency (string) remindersSent (number) lastSentAt (date time) - Update Add reminders config node so update the data table id and intervals in days (default is after 2 days, then after 3 days and finally after 5 days ) - LLM model credentials
How to import this n8n workflow
- 1
Download the workflow JSON file after purchase.
- 2
Open n8n → click the menu → Import from File.
- 3
Select the downloaded JSON and import.
- 4
Set up credentials for each node that requires them.
- 5
Click Execute Workflow to test, then activate.
Setup guide
Setup guide included
Purchase to unlock the full step-by-step guide
Reviews
No reviews yet
Be the first to buy and share your experience.
Leave a review
Sign in to share your experience with this workflow.
Free
No ratings yet
Create a free account to purchase workflows.
- JSON blueprint — instant download
- Setup guide PDF included
- 5 downloads · valid 30 days
- Works with n8n
Free